Safety should be your first step when wiring a motor starter. Understanding its critical role is the first step in this Guide to Installation. From following procedures to using the right tool for the job, every precaution contributes to safer motor starter wiring. Using a motor starter wiring diagram is a good safety practice.
Need Starters For Your Project?
Get Starters QuoteSell To Us
Got Electrical Equipment You Don't Need?

Reduce Your Electrical Inventories & Earn Cash
Sell My EquipmentPanelboard
Need a Panelboard for Your Project/Job?
Our Experienced Sales Engineers Can Help Design the Right Panelboard For You
Learn MoreTransformer Oil Testing
Is Your Transformer Due For Servicing?
Get Your Oil Analysis & Fluid Testing Done By Our NETA-Certified Techs
Learn MoreElectrical Product Resources
Product Training Product Safety Product Guides Product News Featured ProductsPersonal Protective Equipment (PPE) for Motor Starter Maintenance
Before beginning the motor starting wiring process, it’s important to have the right Personal Protective Equipment (PPE). This includes safety goggles, gloves, and suitable clothes. PPE acts as a protection against potential risks during installation. Prioritize safety by wearing protective clothing to reduce the chance of injury and provide a safe working environment. Knowing the basics of motor starters begins with personal safety.
Disconnecting Starter Motor Power Sources
Disconnecting power sources when wiring a motor starter is important for establishing safe motor starting wiring. Before beginning any work, turn off the system’s power supply, either by turning off the main switch or disconnecting it. This safety feature prevents electrical shocks and helps you avoid accidents with live electrical currents. Always consider safety by checking that the power is entirely turned off before beginning any motor starting wiring.
Disconnecting power sources is an obvious but often overlooked step toward establishing safe motor starting wiring. Before beginning any work, turn off the system’s power supply, either by turning off the main switch or disconnecting it.
This safety feature prevents electrical shocks and helps with avoiding accidents with live electrical currents. Always consider safety by checking that the power is entirely turned off before beginning any motor starting wiring.
Tools and Materials Needed for Electric Motor Starter Wiring
Screwdriver Set: for securing terminal connections and mounting components during motor starter installation.
Wire Strippers: used to strip insulation from wires, for clean, secure connections between components.
Multimeter: for measuring voltage, current, and resistance, helping in troubleshooting and ensuring correct electrical connections.
Crimping Tool: for securely crimping connectors onto wires, maintaining reliable electrical connections.
Adjustable Wrench: for tightening and loosening nuts and bolts, ensuring secure fastening of motor starter components.
Materials for Starter Maintenance
Motor Starter Kit: Includes the motor starter unit, contactors, and overload relays for motor control.
Electrical Wire: Different gauges and colors for power and control wiring between components.
Conduit and Connectors: provides a protective housing for wires and ensures a neat and organized installation.
Cable Glands: secures and protects cables at enclosures, preventing damage and supporting an orderly setup.
Labels and Markers: for labeling wires and components, aiding in easy identification and troubleshooting.
Before You Begin Servicing Electric Motor Components
Voltage Compatibility: Before beginning installation, make sure the motor starter is compatible with the voltage source. Check the motor starting literature or labels for voltage parameters and see that they match the power supply.
Refer to the motor specifications provided by the manufacturer. Determine the horsepower, phase, and voltage requirements. To avoid performance issues, check that the motor starter meets OEM specifications.
Mounting the Motor Starter Per OEM Specs
Choose a secure and easily accessible location for mounting the motor starter. The surface should be flat and be able to handle the weight of the starter unit. Use right sized fasteners to mount the starter, following the manufacturer’s guidelines for motor starter mounting.
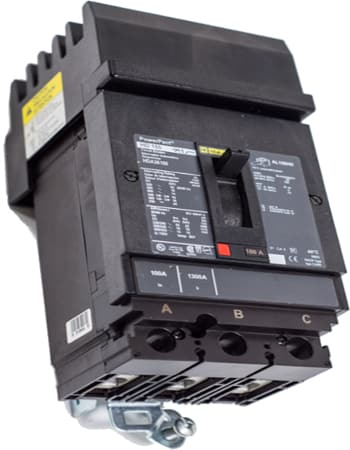
Connect the power supply wires to the designated terminals on the motor starter. Usually there are terminals labeled L1, L2, and L3 for three-phase systems. Follow the motor starter wiring diagram provided by the manufacturer to give you the correct connections.
Control Wiring: Connect the control circuit wires to the terminals specified on the motor starter. These are usually labeled A1 and A2. Check the wiring diagram for proper connection, and use wire nuts or terminal blocks for secure connections.
Overload Protection: Install overload protection devices according to the motor starter wiring diagram. This is needed for protecting the motor from overheating or electrical faults. Follow the manufacturer’s instructions to correctly connect and set overload protection.
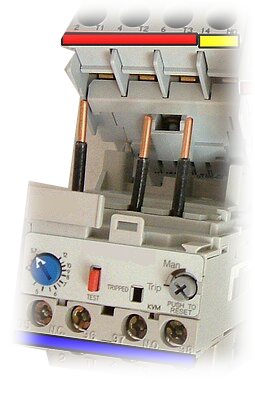
Identifying Motor Leads to Connect the Motor
Identify the motor leads shown on the motor documentation or labels. Three will be labels such as U, V, and W for three-phase motors. Match these with the motor starter terminals for a good connection.
Connect the motor leads to the specified terminals on the motor starter. Double-check the motor starter wiring diagram for accurate connections. Secure the wires tightly, either using terminal screws or other recommended methods provided by the manufacturer.
FAQ’s for Installing, Testing and Troubleshooting a Motor Starter
Q: What are the initial tests to perform after wiring the electric motor starter?
A: Begin by checking the power supply voltage so it matches the motor starter specs. Next, perform a continuity test on the control circuit to verify proper wiring and connections.
Q: How do I test the functionality of the motor starter’s control circuit?
A: Activate the control circuit by applying the right signals. Use a multimeter to measure voltage at the control terminals and be sure they match the values according to the motor starter wiring diagram.
Q: Why is it important to check for abnormal sounds or odors during initial tests?
A: Unusual sounds or smells could mean potential issues. Listen for any unexpected noises, and notice any burning odors suggesting faulty components.
Q: My motor starter is not powering up after installation. What could be the issue?
A: Check the power supply to see it matches the motor starter’s voltage requirements. Confirm wiring by checking power connections, and inspect for any blown fuses or tripped circuit breakers.
Q: Why is the motor starter tripping the overload protection repeatedly?
A: This may mean an overload issue or incorrect motor settings. Reevaluate the motor load and verify that the overload protection settings match the motor specifications. If the problem continues, inspect the motor for potential faults.
Q: How can I address erratic motor behavior during initial tests?
A: Examine the control circuit for loose connections or damaged wires. See that the control signals are reaching the motor starter. If the issue continues, consult the motor starter wiring diagram to confirm good control circuit wiring.
Q: What should I do if the motor starter is not responding to the control signals?
A: Double-check the control circuit for loose or disconnected wires. Verify that the control signals are reaching the motor starter by using a multimeter. If there’s still an issue, inspect the control components for potential faults.
Q: How can I troubleshoot if the motor is not starting as expected?
A: Review the motor starter wiring diagram for correct connections. Confirm that the motor leads are connected to the correct terminals. Check for any faults in the power supply, and inspect the motor for mechanical issues.
Q: What steps can I take if the motor starter is producing unusual noises during operation?
A: Investigate the source of the noise by carefully listening to different components. Inspect moving parts for obstructions or misalignments. If the issue continues, check the motor starter documentation for troubleshooting advice or seek professional assistance.
Mastering wiring motor starters requires technical knowledge and a commitment to safety. Remember safety first, using protective gear, and disconnecting power sources for a successful and secure installation. This sets you up for efficient and trouble-free motor starter wiring.
Need more help? Contact a product specialist: 800.497.6255
IMPORTANT: Electrical systems can be hazardous, and working with them without the necessary expertise and training can be dangerous. If you’re not a qualified electrician or don’t have experience selecting motor starters, it’s highly recommended to get the assistance of a certified electrical professional. Performing electrical work without the needed knowledge and training may lead to severe injuries, electric shocks, or damage to the equipment. Always prioritize safety and, when in doubt, contact a qualified electrician about how to select and install an electrical starter and perform related electrical maintenance.