Lighting control is critical for increasing energy efficiency and producing an safe environment in situations, including residential, commercial, and industrial settings. Lighting contactors for lighting control are needed for accurate control of lighting systems in facilities and temporary power for a jobsite.. This post will lead you through the procedure of wiring a lighting contactor step by step. Understanding how to connect a lighting contactor is critical for effective and dependable lighting management.
Need Lighting Contactors for Your Project?
Get Lighting Contactor QuoteSell To Us
Got Electrical Equipment You Don't Need?

Reduce Your Electrical Inventories & Earn Cash
Sell My EquipmentPanelboard
Need a Panelboard for Your Project/Job?
Our Experienced Sales Engineers Can Help Design the Right Panelboard For You
Learn MoreTransformer Oil Testing
Is Your Transformer Due For Servicing?
Get Your Oil Analysis & Fluid Testing Done By Our NETA-Certified Techs
Learn MoreElectrical Product Resources
Product Training Product Safety Product Guides Product News Featured ProductsHow Do Lighting Contactors Control Power?
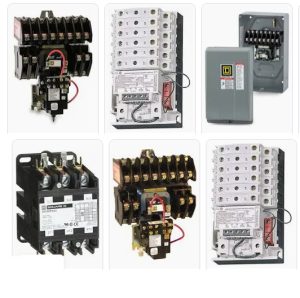
Before we go into the wiring, let’s define what a lighting contactor is and why it’s so important. A lighting contactor regulates lighting circuits and bridges the power source and the lighting fixtures for centralized control, automation, and remote operation.
4 Reasons for Using Lighting Contactors:
1. Improved Control: Lighting contactors provide precise control over lighting circuits, allowing individual or grouped light activation and deactivation.
2. Energy Efficiency: Provide energy efficiency by assisting planned or sensor-based lighting control, this decreases wasteful energy usage.
3. Increased Fixture Life: Gradual startup and shutdown of lighting circuits increases lifespan of bulbs and fixtures, saving money on maintenance.
4. Safety: Lighting contactors safeguard against overload and can isolate damaged circuits, lowering the danger of electrical mishaps.
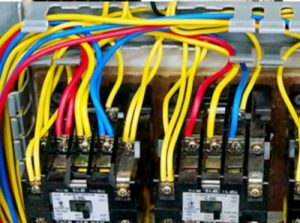
Wiring Electrical Contactors for Lighting Step-by-Step
Now that we have a basic understanding of lighting contactors and their benefits, let’s look at a step-by-step guide on wiring an electrical contactor for lighting control.
Step 1: Gather Necessary Tools and Materials for Lighting Contactor Wiring
– Lighting contactor (appropriate for your application)
– Circuit breaker or disconnect switch
– Wiring cables (THHN or equivalent)
– Wire strippers
– Screwdrivers (flathead and Phillips)
– Wire connectors (wire nuts)
– Safety glasses and gloves
– Electrical tape
– Voltage tester
– Cable clamps and fasteners
– Mounting hardware (if required)
Step 2: Lighting Contactor Wiring and Lighting Safety
When working with electrical systems, safety is top of mind. To begin, switch off the electricity to the lighting circuits you’ll be working on. Before proceeding, use a voltage tester to ensure that the circuits are de-energized. Wear adequate safety equipment, including gloves and safety glasses.
Step 3: Mounting the Lighting Contactor
If your lighting contactor needs to be mounted, choose a place near the lighting circuits it will control. Using the included mounting hardware, make sure that it’s securely fastened to a stable surface. Check for appropriate clearance for wiring and proper ventilation.
Step 4: Make Electrical Connections
a. Power Supply Connection: Connect one end of the power supply wire to the circuit breaker or disconnect switch’s line side.
– Connect the opposite end of the power supply wire to the lighting contactor’s line-side terminals. These terminals are usually called L1, L2, and L3.
– Securely tighten the terminal screws to make a suitable electrical connection.
b. Load Interconnection:
– Connect one end of the load cable to the lighting contactor’s load-side terminals. T1, T2, and T3 are the most common labels for these terminals.
– Connect the load cable’s other end to the lighting fixtures or circuits you want to operate.
– Tighten the terminal screws on the contactor and the lighting fittings securely.
Step 5: Lighting Control Wiring
Depending on your application, you may need to connect control devices such as switches, sensors, or timers to the lighting contactor’s control terminals. These control terminals are commonly referred to as A1 and A2.
a. Manual Operation:
– To control the contactor manually, connect terminals A1 and A2. This switch can be installed on the contactor or remotely.
b. Automation and Control:
– Connect control devices such as occupancy sensors, timers, or photocells between terminals A1 and A2 for automatic control.
– Check that these devices are appropriately configured to trigger the contactor as required by your lighting control strategy.
Step 6: Power Cable Management
Using cable clamps and fasteners, neatly arrange and secure the electrical cables. This step is critical for preventing loose cables and ensuring a neat installation. Insulate any exposed conductors with electrical tape.
Step 7: Validation and Testing
Once all connections have been completed, test the lighting contactor to confirm that everything is operating properly:
– Turn on the circuit breaker or disconnect switch to restore power to the lighting circuits.
– Verify that the contactor may be triggered and deactivated using the switch by testing the manual control (if applicable).
– Run the automatic control (if applicable) to ensure that the contactor responds as expected to the sensors or timers.
Step 8: Labeling and Documentation for Lighting Contactor Wiring Diagrams
Label the contactor and its associated circuits correctly for future reference. Create documentation that contains a wiring diagram and a list of the devices that are connected. This documentation will be extremely useful for future troubleshooting and maintenance.
With proper training and supervision, anyone working in electrical installations or lighting control systems should be able to wire a lighting contactor. You can get control over your lighting circuits by following this step-by-step approach, improving energy efficiency, safety, and convenience. Always keep safety in mind, and if you are unsure about any aspect of the wiring procedure, call a certified electrician. You can confidently wire a lighting contactor for accurate lighting control in your workplace if you have the necessary training, experience and tools.
Overload Protection: Built-in Safety for Lighting Contactors
When it comes to operating lighting systems, one critical feature that frequently goes ignored yet is critical is overload protection. Lighting contactors, often used to regulate lighting circuits in a variety of applications, include built-in safety mechanisms to prevent overload scenarios and maintain the lifespan and reliability of your lighting fixtures. Now let’s look at the importance of overload protection in lighting contactors, how it works, and why it’s necessary in any lighting control system.
Why You Need Overload Protection in Your Lighting Control System
Overload protection is an important safety feature that protects electrical circuits and equipment from excessive current flow. Overload prevention systems are critical in the context of lighting contactors for preventing electrical overloads that can damage components, cause overheating, and even lead to electrical fires. Overloads occur when the current in a circuit exceeds the equipment and wiring safe working limitations.
Overloads in lighting circuits are caused by sources, including:
1. Short circuits: A low-resistance straight path that permits excessive current to flow.
2. Wiring issues, such as loose connections or damaged insulation, are examples of circuit defects.
3. Energized lighting fixtures: Turning on many lighting fixtures at the same time can cause a surge in current.
Lighting contactor overload protection is critical for mitigating these hazards and ensuring the safety and reliability of your lighting systems.
How Does Overload Protection in Lighting Contactors Work?
1. Thermal Overload Defense:
– Thermal overload protection is based on contactor heat-sensitive components. These elements monitor the contactor’s temperature as well as the current flowing through it.
– If the current exceeds the rated capacity for a lengthy time period, heat-sensitive elements respond by tripping or disconnecting.
– De-energizing the contactor coil interrupts current flow to the lighting circuits, reducing overheating and potential damage.
– Once the overload condition is resolved, the contactor can be manually reset or may automatically reset after a cooldown period.
2. Magnetic Overload Protection: – Magnetic overload protection uses a coil or electromagnet in series with the load. When an overload occurs, the additional current creates a magnetic field that resists the electromagnetic field.
– When the magnetic forces balance or exceed a specified threshold, the overload protection system opens the contactor, interrupting current flow.
– Magnetic overload protection is more immediate than heat protection and is frequently used in tandem for increased safety.
What are the Benefits of Overload Protection in Lighting Control Systems
1. Assurance of safety:
– Overload protection is a critical safety feature that cuts off power when an overload condition is detected, preventing electrical hazards such as fires and equipment damage.
– This feature safeguards both people and property in residential, commercial, and industrial settings.
2. Longevity of Equipment: – Overloads can cause early wear and damage to lighting fixtures, bulbs, and electrical components. Overload protection protects these assets by avoiding excessive current flow.
3. Dependability:
Overload prevention improves the overall reliability and performance of lighting control systems by reducing overheating and component damage.
4. Observance:
– Overload protection is called for by many electrical rules and regulations in lighting circuits to make sure that installations meet safety standards and building codes.
How to Select the Correct Type of Lighting Contactor
You should examine the specific needs of your application when selecting a lighting contactor. Consider the following factors:
1. Load Capacity: Select a contactor with a load capacity which is equivalent to the entire current requirements of your lighting circuits.
2. Overload Protection Method: Determine whether the contactor uses thermal, magnetic, or a mix of the two overload protection mechanisms. This decision is affected by your particular application as well as local rules.
3. Application Environment: Consider the contactor’s working environment, such as temperature, humidity, and exposure to dust or corrosive materials.
4. Control Mechanisms: Consider control alternatives like manual control, remote control, and compatibility with automation systems or control panels.
When it comes to wiring and overload protection using lighting contactors, this guide should help you with dependable operation of lighting systems in workplaces, factories, and your home. You can make informed judgments when selecting lighting contactors for your projects if you understand how overload protection works and its importance in protecting your equipment and personnel. Putting safety first with built-in overload protection must be foremost on your mind in any lighting control system.